
Pickled garlic transforms how you use garlic in the kitchen if you love the flavor but want something milder!
The whole cloves mellow out completely in the brine and turn sweet and tangy instead of sharp and pungent.
I use a simple vinegar brine with a little sugar and some herbs to let the garlic flavor shine through.
You can toss them in salads, pasta, or eat them like fancy little snacks!
Once you start keeping a jar of these in your fridge, you’ll find yourself adding them to things without even thinking about it.
How to Make Pickled Garlic Recipe
Ingredients
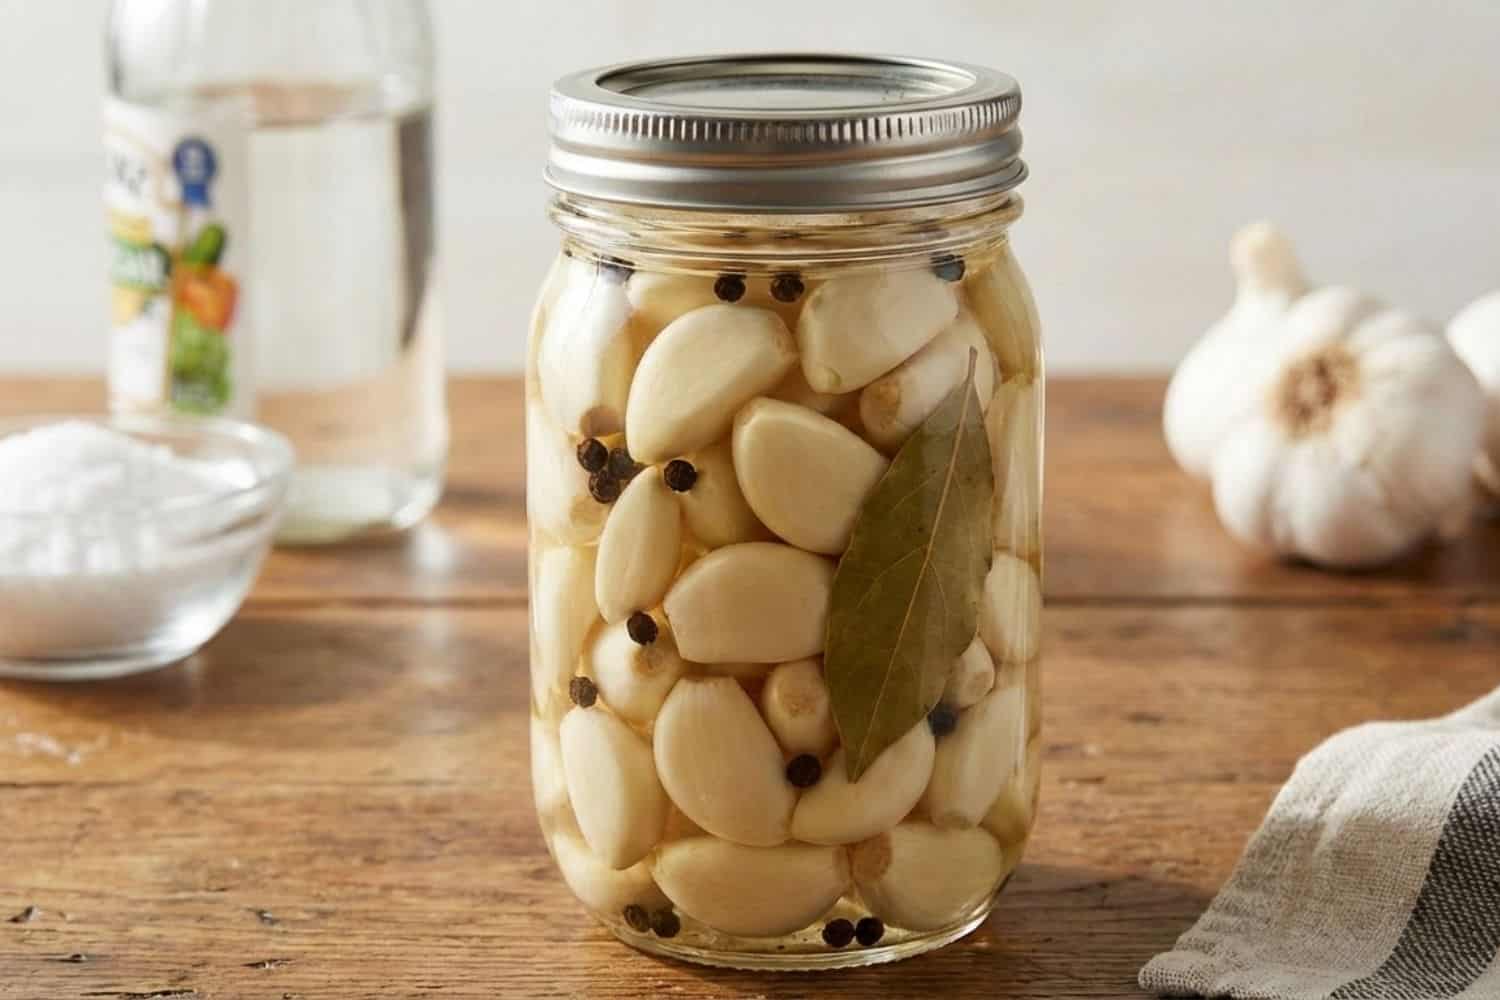
- 2 cups Garlic Cloves (peeled)
- 1 cup Distilled White Vinegar
- 1 cup Water
- 1 tbsp Pickling Salt
- 1 tsp Black Peppercorns
- 1 Bay Leaf
Step-by-Step Instructions
Step 1:
Wash a 1-pint glass jar and lid with hot soapy water, rinse, and let them air-dry completely.
Dry tools matter; extra moisture can water down the brine and make garlic mushy.
Step 2:
Trim the root ends off the peeled garlic cloves, then pack them tightly into the clean jar.
I like to leave the cloves whole; they stay firm and slice up nicely later.
Step 3:
Add the peppercorns and bay leaf right into the jar with the garlic.
Give the jar a gentle shake to help the spices settle in between the cloves.
Step 4:
Combine vinegar, water, and pickling salt in a small saucepan and bring to a boil.
Stir just until the salt dissolves, then take it off the heat.
Step 5:
Pour the hot brine over the garlic so it’s fully covered, leaving about half an inch at the top.
Tap the jar on the counter a couple times to knock out any trapped air bubbles.
Step 6:
Let the jar cool to room temperature, seal it up, and pop it in the fridge.
You can sneak a taste after three days, but the flavor gets better after a week.
Tips and Tricks for Making This Recipe

Garlic Selection
Pick firm, fresh garlic; skip any with green sprouts.
Old cloves tend to taste harsh and bitter after pickling.
Vinegar Choice
Swap white vinegar for apple cider vinegar if you want, but the brine will be darker and the acidity a bit softer.
Color Changes
If your garlic turns blue or green, don’t worry.
It’s a natural reaction and doesn’t mess with safety or taste.
Flavor Adjustments
Sometimes I’ll toss in a dried chili or dill seed if I’m feeling like a bit of heat or herbal kick, but not too much; garlic should stay the star.
Storage Advice
Keep the jar in the fridge and always use clean utensils.
That way, your garlic stays fresh for months.
What to Serve with Pickled Garlic Recipe

Grilled Meats
Pickled garlic is great with grilled chicken, steak, or pork chops.
The tangy cloves cut through rich, smoky flavors in the best way.
I’ll chop a few and spoon them over hot meat just before serving; honestly, the acidity perks up every bite.
Roasted Potatoes
Crispy roasted potatoes and pickled garlic? Yes, please.
Potatoes soak up the briny flavor but don’t get overwhelmed.
Toss sliced pickled garlic with warm potatoes, olive oil, and herbs.
It’s hard to stop at one bite.
Fresh Green Salad
A basic green salad gets a lift when you slice pickled garlic thin and scatter it over leafy greens and cucumber.
I like to add a splash of the pickling brine to the vinaigrette for a sharp, clean finish.
Fried Rice
Maybe it sounds odd, but chopped pickled garlic in fried rice adds a little crunch and brightens up the whole dish.
Stir it in near the end; start with a small amount so the flavors don’t get muddled.
Cheese and Bread Plate
Add whole pickled garlic cloves to a cheese and bread plate for a fun twist.
Mild cheeses work best, and honestly, the garlic refreshes your palate between bites.
Variations and Substitutions
Vinegar Choices
For a sharper edge, use white wine vinegar.
Rice vinegar is softer; I reach for that when I want something gentler.
Sweetness Options
You can skip sugar or swap in honey or maple syrup. Adjust slowly to taste—too sweet and you’ll lose the punch.
Spice Add-Ins
Add red pepper flakes, sliced chilies, or extra peppercorns for heat.
I always start small; you can add more, but you can’t take it out.
Herb Swaps
Try fresh thyme, rosemary, dill, or bay leaves.
Mix and match based on what you have kicking around.
Salt Alternatives
Kosher or pickling salt works fine.
Avoid iodized salt; it clouds up the brine and just looks off.
Flavor Boosts
Mustard seeds, coriander seeds, or a splash of leftover pickle brine can add some depth if you’re in the mood.
How to Store Leftover Pickled Garlic Recipe
Refrigerator Storage
Always store leftover pickled garlic in the fridge, fully submerged in brine.
Cold keeps the flavor steady (and safe) for months.
I tuck the jar toward the back where it stays coldest.
The fridge door swings can mess with texture over time.
Containers and Handling
Use a clean glass jar with a tight-fitting lid.
I avoid metal lids since vinegar can react with them.
Grab a clean fork every time; don’t use your fingers, or you’ll introduce moisture and unwanted bacteria.
Shelf Life and Safety
Pickled garlic keeps its quality for a few months in the fridge, though the flavor will mellow out over time.
If you spot mold, weird cloudiness (not from spices), or sharp off smells, just toss it. Better safe than sorry.
Never leave leftovers at room temperature; refrigeration is the only way I trust for home batches.
Common Mistakes to Avoid
Weak Brine Ratios
It’s tempting to eyeball the brine, but weak vinegar or too little salt leaves garlic soft and risky to eat.
Measure your vinegar, water, and salt every time for a sharp, clear brine.
Skipping Proper Drying
If you skip drying the peeled cloves, you’ll get cloudiness and shorter shelf life.
I always pat them dry and let them air-dry while I sterilize jars.
Overheating the Garlic
Cranking up the heat can mess with garlic’s texture; I’ve watched it go all rubbery after a hard boil. Not great.
I just heat the brine enough to melt the salt, then yank it off the burner right away. No need to get fancy.
Pickled Garlic Recipe
Ingredients
- 2 cups Garlic Cloves peeled
- 1 cup Distilled White Vinegar
- 1 cup Water
- 1 tbsp Pickling Salt
- 1 tsp Black Peppercorns
- 1 Bay Leaf
Instructions
- Wash a 1-pint glass jar and lid with hot soapy water, rinse, and let them air-dry completely.
- Dry tools matter; extra moisture can water down the brine and make garlic mushy.
- Trim the root ends off the peeled garlic cloves, then pack them tightly into the clean jar.
- I like to leave the cloves whole; they stay firm and slice up nicely later.
- Add the peppercorns and bay leaf right into the jar with the garlic.
- Give the jar a gentle shake to help the spices settle in between the cloves.
- Combine vinegar, water, and pickling salt in a small saucepan and bring to a boil.
- Stir just until the salt dissolves, then take it off the heat.
- Pour the hot brine over the garlic so it’s fully covered, leaving about half an inch at the top.
- Tap the jar on the counter a couple times to knock out any trapped air bubbles.
- Let the jar cool to room temperature, seal it up, and pop it in the fridge.
- You can sneak a taste after three days, but the flavor gets better after a week.